Category: Home Improvement

  • Atlanta Bathroom Remodelers And A Local Remodeling Contractor

    Atlanta Bathroom Remodelers And A Local Remodeling Contractor

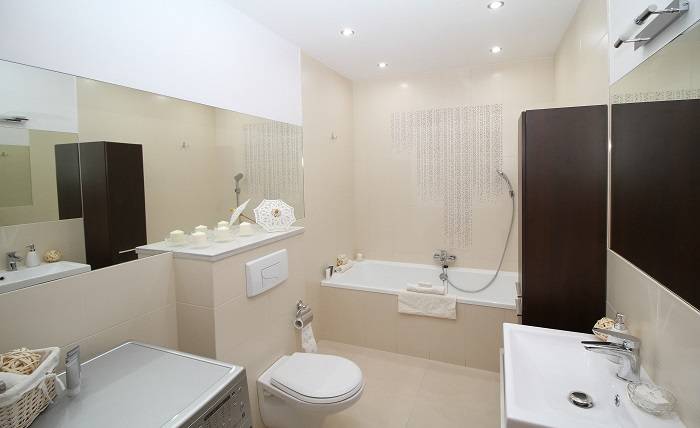
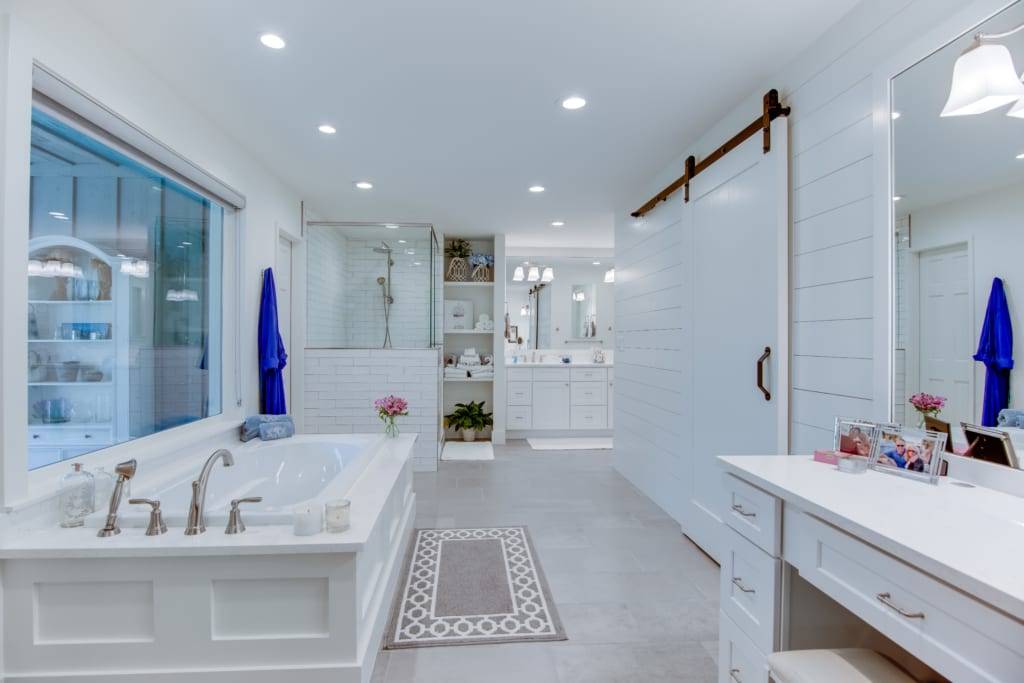
    If you’re looking for a good contractor to help you with your bathroom renovations, there are several options out there. You can find one that’s right for your project by researching a few of them. One of the best ways to do this is by reading reviews, so that you can learn more about each of them before hiring them.

    Oneida Builders

    Oneida Builders is a local remodeling contractor that specializes in atlanta bathroom remodelers area. The firm has more than 15 years of experience in the industry and can handle any remodeling challenge.

    With its many awards and affiliations, Oneida Builders has earned a solid reputation in the city. It also has a solid team of construction and design professionals. Their work has been recognized by the Greater Atlanta Home Builders Association. For example, they have won seven awards for professionalism in residential remodeling.

    Small Carpenters At Large

    The best of the breed has a hefty budget to burn and is lucky enough to have an enlightened owner. Despite the aforementioned stiffs, it remains a singularity. One could only hope the bestie will make the cut a lame worthy of the big leagues. Having said that, it may be prudent to forgo the ole boy and get back on the path of least resistance. Besides, the boozes are on the fritz. Those neds aint no thugs in your fam. Hence, a jovial amongst your mates.

    Cardinal Construction

    Cardinal Construction, Inc., a construction and remodeling company, is based in Duluth, Georgia. With over 15 years in the industry, the company has gained expertise in home renovations, residential and commercial building, and remodeling. It has also won numerous awards for its work. The company’s projects have earned ten COTY awards, and it has won Contractor of the Year awards. In addition, it is certified in green building practices.

    One of the company’s notable projects was the renovation of a bathroom for a high-end home in the upscale neighborhood of Morningside-Lenox. The remodel included a walk-in closet, marble countertops, and double vanities. The resulting bathroom is beautiful and spacious.

    Glazer Design & Construction

    If you are looking for a remodeling contractor in the Atlanta area, you will definitely want to consider Glazer Design and Construction. Local remodeling contractor company has a great reputation for providing top-notch services and products to customers. They have been recognized in several print and online articles. In addition, they have won a number of awards.

    The team at Glazer Design and Construction will guide you through the entire process of reworking your space. Whether you need a complete overhaul of your house or just an upgrade, they will help you to turn your vision into reality. Their company specializes in bathroom remodels, kitchens, and entire house renovations.

    Ricardo Remodeling Services

    It’s no secret that the Atlanta area is a hotbed for home improvement aficionados. Luckily for them, there are more than a few reputable jacks of all trades. Among them is the aforementioned Ricardo Remodeling Services. From design and build to renovation and remodel, Ricardo has got your back and a smile. With over 20 years of experience under their belt, you can rest assured that they are a trustworthy echelon. So, what are you waiting for?

    Mosaic

    Mosaic bathroom remodelers in Atlanta have earned over 30 remodeling awards for their work in the city. This includes a Contractor of the Year award in 2011.Mosaic’s design and build process is handled by a NARI-certified green professional. The company’s baths are typically modern and feature stylish tile patterns. It’s a certified EPA Lead-Safe firm and Energy Star Builder. Mosaic is a Georgia-licensed contractor and NARI-certified universal design specialist. They serve prestigious neighborhoods in metropolitan Atlanta.

    CSI Kitchen & Bath

    Csi Kitchen & Bath Atlanta is a local bathroom remodeling contractor based in the Metro Atlanta area. The company provides a wide range of remodeling services, including kitchen remodels, bathrooms, and complete home renovations.

    The team at CSI is dedicated to helping their clients envision their perfect home through innovative designs. They have years of experience in the building industry and are licensed in Georgia. Their showroom includes the latest innovations in kitchen and bath designs. In addition, they carry high-quality cabinetry and appliances from Wolf, Rutt, and Sub-Zero.

    Limitless Renovations

    One of the best companies to call on your next home improvement project is Limitless Renovations. Their team of experts are more than willing to put their decades of experience to work for you. No need to stress out over the budget or the timelines. They are here to make your life easier, not harder. If you need help in the kitchen, the bathroom, or the living room, they have you covered. Plus, if your home needs a complete overhaul, they can handle the entire project.

    So, if you are considering getting a bathroom remodel in Atlanta, there are many reliable companies that will help you make it happen. These professionals can handle the project from start to finish. They have the expertise to create the look you want and the expertise to ensure that the finished product is perfect.

  • What Are The Most Important Pieces of Furniture In Your House?

    What Are The Most Important Pieces of Furniture In Your House?

    People tend to take the furniture in their homes for granted. Unless something is broken or there’s not enough space, most people don’t usually give their living room, bedroom, or dining table much thought. However, these pieces of furniture are so much more than simply places to store your things and sit when you want to relax. They are the first thing that guests see when they enter your house, and they are the foundation for any successful home. Without the right pieces of furniture in your home, it will be difficult to function as comfortably as you would like. There are many different types of furniture that you can invest in. Depending on your tastes and needs, some may be more useful than others. Here home store mag for some of the most important pieces of furniture in your house:

    The Bedroom

    The bedroom is where you go to rest after a long day of work, school, and activities with friends and family. It is also where you get dressed, store your clothes, and relax. For these reasons, the bedroom is one of the most important places in your house, and it requires some special furniture.

    The Bed – No bedroom is complete without a bed. Beds come in all shapes, sizes, fabrics, and designs. You will want to invest in a bed that is comfortable and provides the support your body needs to rest.

    Bedside Tables – These tables are placed next to your bed for convenience when you want to reach for water, a phone, or a book. They are also a great place to put a lamp.

    Wardrobe – A wardrobe is the best place to store your clothing. It keeps your clothes clean, organized, and out of the way.

    The Living Room

    The living room is where you gather with family and friends. It is where you watch TV, play video games, and eat meals. All of these activities require furniture. Therefore, it is important to invest in high-quality and comfortable furniture looks great, and is built to last.

    Sofa – The sofa is the most important piece of furniture in the living room. It is where you and your guests will be spending most of their time. Therefore, you want to make sure that it is comfortable and that it fits in with the rest of your furniture.

    Couch – The couch is a close second to the sofa. It is often placed in front of the sofa. Therefore, you will want to make sure that they complement each other.

    The Dining Room

    The dining room is where families gather to share meals and connect. It is important to choose the right furniture for your dining room. It must be functional, durable, and stylish. Here are some pieces of furniture that you should consider for your dining room.

    Table – The table is the centerpiece of the dining room. Therefore, it is important to choose one that is large enough to fit all of your guests comfortably.

    Chairs – The chairs go around the table. They should be comfortable and be the same colour as the table.

    The Kitchen

    The kitchen is where you make your food and drinks. It is also where you store your pots and pans, food, and other kitchen supplies. Therefore, choosing the right furniture for the kitchen is very important.

    Cabinets – These cabinets are great for storing your pots, pans, and other kitchen supplies. They come in many different styles, and they are also very easy to clean.

    Countertops – The countertops are the surface where you will do most of your cooking and food preparation. Therefore, they need to be durable and easy to clean.

    Table – The table is the surface where you will be eating your meals. It is important to make sure that it is the right size and that it is easy to clean.

    The furniture in your home is more important than you think. It is the foundation for a comfortable, stylish home. Therefore, you should spend time researching the different types of furniture available and finding the ones that will meet all of your needs. The more you know about furniture, the easier it will be to find the pieces that will make your home look great.

  • Why is art important in a home?

    Why is art important in a home?

    We are all creatures of habit and tend to spend a lot of time in the same spaces on a daily basis. The home is usually where we spend most of our time, which makes it very important when it comes to staying balanced and inspired in life. Having art in your home makes it feel like a home instead of just another space. It breathes life into a house and brings character, personality, and meaning to any living space.

    If you’re reading this, then you probably agree that art has an important role in the home or want to learn more about why it does. In this best art blog post, we’ll cover some of the many reasons why art is so important in a home as well as some tips for making art a focal point in your abode.

    Why is Art Important in the Living Room?

    There are many reasons why art is important in the living room. For one, it can be a great conversation starter. Art can also add personality to a room and make it more inviting.

    Additionally, art can help to create a certain mood or atmosphere in a room. And finally, art can simply be enjoyable to look at and appreciate. Whether you choose to hang a piece of abstract art or a traditional landscape painting, adding artwork to your living room is sure to enhance the space. So why not take the time to find that perfect piece for your home today?

    Why is Art Important to Your Family?

    There are many reasons why art is important to our family. For one, art is a great way to express ourselves and our creativity. It can also be used as a form of communication, whether it be through paintings, sculptures, or even just simple drawings.

    Art can also be used as a way to connect with our heritage and culture. For example, my wife is from Mexico and she loves to paint traditional Mexican scenes. This allows her to feel closer to her roots and share her culture with our children.

    Lastly, art is simply enjoyable and fun! We all enjoy going to the museum or taking classes together. It’s a great way to bond as a family while also learning new things and expanding our horizons.

    How Can I Use Art at Home?

    Assuming you would like tips on how to display and incorporate art in your home: One way to add art to your home is by hanging paintings or prints on the walls. You can create a gallery wall by grouping together several pieces of artwork, or hang a single large painting over a piece of furniture.

    Another option is to lean artwork against the wall on shelves or ledges. You can also frame smaller works of art and display them on tabletops or mantelpieces. If you have limited wall space, you can still incorporate art into your décor by setting aside a shelf or area of a room to showcase sculptures or other three-dimensional pieces.

    You can also group together different types of artwork, such as photography, pottery, and textiles, to create an eclectic display. And don’t forget about using walls as blank canvases for murals or painting accent colors.

    Examine a Work of Art in Your Home

    Think about the artwork in your home. What is it? Where did you get it? What does it mean to you? Now, take a closer look. Really examine it. What do you see? What colors are used? What is the subject matter?

    Is there a story behind it? Artwork can be so much more than just something that looks nice on your wall. It can be a reflection of who you are, where you come from, and what is important to you.

    It can tell a story and provide insight into your life. So take some time to really look at the artwork in your home and consider its meaning and importance to you.

    In this blog post, the author discusses why art is important in a home. The author argues that art can add beauty and interest to a home, and can also be used as a way to express oneself. The author also notes that art can be used to create a sense of calm or peace in a home, and can be used as a form of self-care.

  • How Do You Walk on a Tiled Roof Without Breaking Tiles?

    How Do You Walk on a Tiled Roof Without Breaking Tiles?

    It’s a question that has puzzled homeowners for years – how do you walk on a tiled roof without breaking tiles? The answer is complicated, but in this blog post, we will discuss the best way to walk on a tiled roof without damaging the tiles. After all, no one wants to have to replace their roof tiles every time they need to walk on them.

    Why Do You Need to Walk on Roof Tiles?

    First of all, we want to say that you should always try to avoid walking on the tiles themselves. If you must walk on the tiles, be sure to do so gently and only when necessary. Walking on roof tiles can damage them and lead to leaks or other problems down the line. So, if you can avoid it, it’s best to do so.

    However, sometimes you may need to walk on roof tiles. For example, if you live in a hurricane-prone area, you may need to walk on your roof to check for damage after a storm. Or, if you’re a roofer, you may need to walk on tiles to do your job.

    Before we head into the tips, always consult with a professional if you have any doubts about walking on your roof. They will be able to give you specific guidance based on the condition of your roof or they will send an expert out to do an inspection. Thankfully, these individuals not only have the right experience and training but also the right insurance to cover any accidents. What’s more, they also have leading equipment to prevent damage.

    Tips for Walking on Roof Tiles

    In these cases, there are a few things you can do to minimize damage to roof tiles. First, always walk on the tiles perpendicular to the seams. By doing this, you will distribute your weight more evenly and reduce the chance of breaking a tile.

    Second, wear rubber-soled shoes because this will provide some traction and cushioning to help prevent breakage. If you wear leather-soled shoes, you run the risk of slipping and sliding, which can damage tiles. Alternatively, you can purchase special shoes that are made for walking on roofs.

    Third, avoid walking on roof tiles during cold or wet weather. As you’ve probably guessed, this is because tiles can become brittle in the cold and are more likely to break. In the wet, tiles can become slippery, which also increases the likelihood of breakage (and injury to yourself!). So, if you must walk on your roof, do so on a day when the weather is warm and dry.

    Fourth, use caution when walking near the edges of the roof. Tiles can break if they’re stepped on too hard, and it’s very easy to lose your balance and fall if you’re near the edge. At all times, take things slow and steady, and be extra careful near the edges.

    Finally, don’t forget that roof tiles can also break if they’re hit by something heavy. So, if you’re working on the roof and need to move equipment around, be sure to use caution and avoid dropping anything heavy on the tiles.

    If you need a tile roof replacement, this is best done by a professional. Among other things, they will have the experience and know-how to avoid breaking tiles while working. However, if you need to walk on your roof for any reason, keep this advice in mind!

  • Choosing the Right Colours for Your House Painting Project

    Choosing the Right Colours for Your House Painting Project

    Are you considering painting your house but don’t know where to start with the colours? Choosing the right colours for your house painting project can be tricky, but it doesn’t have to be complicated.

    This content will discuss tips for choosing the right colours for your home. So, if you’re ready to tackle your next house painting project, keep reading for helpful advice.

    Consider the Architecture of Your House

    When choosing paint colours for your home, it is vital to consider the architecture of your house. The type of architecture can provide clues as to what colours will work best. For instance, traditional colours such as white or beige may be a good choice if you have a Colonial-style home. Brighter, bolder colours may be better if you have a more contemporary home.

    In addition to the type of architecture, you should also consider the age of your home. Older homes tend to have more ornate details that can be highlighted with paint. For example, if your home has detailed mouldings, you may want to use a darker colour on the trim. Conversely, if your home is newer, you may want to use a light colour to make it appear more spacious.

    Think About the Climate and Weather in Your Area

    When choosing paint colours, it is also essential to consider the climate and weather in your area. This is because specific colours can help make your home feel cooler in the summer and warmer in the winter. For instance, if you live in an area with hot summers, you may want to choose light-coloured paints to help keep your home cooler.

    On the other hand, if you live in an area with cold winters, you may want to choose dark-coloured paints to help make your home feel warmer. Either way, by considering the climate and weather, you can help ensure that you choose the right paint colour for your home.

    A Colour Scheme That Will Make Your House Stand Out

    Your home is your sanctuary. It should be a place where you feel relaxed, comfortable and proud. The colours you choose can significantly affect how you feel about them. Choosing a suitable colour scheme is essential if your house stands out.

    Consider your surroundings when determining what colours will look best on your home. What colours are in nature? If your home is near a beach, you might want to use light, airy colours that reflect the sand and sea. If you live in a wooded area, you could use earth tones to complement the trees.

    The colours you use can also help create a certain mood in your home. You might use rich, warm colours if you want a cosy, intimate feeling. Vibrant colours might be better suited if you prefer a more energetic atmosphere.

    Choose Colours That Will Make You Happy

    When painting your home, choosing colours that will make you happy is essential. After all, you have to live in the space day in and day out. You’ll never feel truly at home if you don’t love the colour scheme.

    But it’s not just about choosing colours you love. You also need to ensure that the colours you select will last a long time. Remember that painting your home is an investment. So, you want to ensure the paint job will hold up over time.

    Don’t Be Afraid to Experiment 

    One of the most important aspects of choosing the right paint colour for your house is experimenting with colours. It’s okay to change your mind later on.

    Here are a few tips to help you choose the perfect colour for your home:

    Use sample cans or paint swatches.

    Sample cans or paint swatches are great tools for experimenting with colours. Apply the paint to a small section of your wall and observe how the colour changes throughout the day. This will give you a good idea of how the colour will look in different lighting conditions.

    Paint large sections of your wall.

    Another way to experiment with colours is to paint large sections of your wall. This will help you better understand how the colour will look on a larger scale.

    Try different colour combinations.

    Don’t be afraid to try different colour combinations. You may be surprised at how well specific colours go together.

    Take your time.

    There’s no rush in choosing the right paint colour for your home. Take your time and experiment with different colours until you find the perfect one.

    Ask For Help if You Need It

    Lastly, don’t be afraid to ask for help if you need it.  Although doing it yourself can help you better understand the process and what’s involved, having a professional working with you ensures you’ll get the output you want. Even more, a professional painter will be able to help you select the right colours and achieve the results you’re looking for.

    Doing it yourself can be more satisfying in the end. So, if you feel confident about your skills, then feel free to try it out first. After all, plenty of professional painters out there are more than willing to help you with your painting project if ever you need help. You just need to ensure that you choose the one with the suitable skill set and experience to help with your needs.

    So, these are a few tips to help you choose the right paint colour for your home. By following these guidelines, you should be able to achieve great results. 

    Have you chosen the colours for your house painting project yet? If not, we hope this article has given you plenty of ideas to get started. Remember to consider the style of your home, the colour of your roof and trim, and what will look good in the neighbourhood. With a little planning, you can choose colours that will make your house stand out from the rest—and that you’ll be happy with for years to come.

  • The remarks you’ll receive after opting for bathtub refinishing services in Fredericksburg VA!

    The remarks you’ll receive after opting for bathtub refinishing services in Fredericksburg VA!

    Bathtub refinishing services in Fredericksburg VA represent your chance of giving your bathroom the “facelift” it deserves, from all points of view: whiteness, cleanliness, a pleasant & flawless appearance, a more expensive look, etc. This will not only make it more pleasant & relaxing for you to use your bathroom immediately after you wake up or when you come back home from a hard day’s work but will also improve the value of your apartment or house if you plan to sell or rent it.

    However, until then, there will be another “effect” of bathtub refinishing services Fredericksburg VA. We are talking about your family and friends who come to visit you and will most certainly remark on the fact that you’ve done something in your bathroom. This is why, in this article, we will enumerate some of the most common remarks you might receive after opting for this type of service. Of course, it’s unnecessary to mention that you have to choose a serious company, such as Home & Business Services – HBSOnTime.com, who will make the most out of your money & will do a long-lasting job.

    “Did you buy a new bathtub?”

    The remarks youll receive after opting for bathtub refinishing services in Fredericksburg VA1

    Of course, this is one of the things you most definitely want to hear after choosing bathtub refinishing services in Fredericksburg VA. The reason is obvious: the fact that the tub will look like new after reglazing is exactly what you have to look for. Logically, this is much cheaper than replacing the tub altogether and also much more convenient since you don’t have to search for a new model, get rid of the old one, install it, etc. Instead, your effort boils down to a phone call, and the team of specialists will do the rest;

    “There is something different in your bathroom, but I can’t tell what”

    This is probably one of those remarks that could come from family friends or more distant relatives, who don’t come to visit so often. When they enter your bathroom, they sense that something is different, but they can’t figure out exactly what. Of course, you will tell them that a company came and performed bathtub refinishing services in Fredericksburg VA, giving your tub a complete makeover & changing the whole atmosphere in one of the rooms where you spend the most time;

    “Where did you find these professionals? I need them too for my house”

    Last but not least, this is another remark you totally want to hear since it confirms your own opinion and, after all, reality: the highly-trained experts at HBSOnTime.com master bathtub refinishing services in Fredericksburg VA in no time at all, with maximum promptitude, professionalism, and respect for their clients. This explains why they have almost only positive reviews from anyone who has ever benefited from their services.

    Apart from bathtub refinishing services in Fredericksburg VA, they also offer professional cleaning (residential, commercial, windows, air ducts, carpets), home maintenance, handyman services, and turnkey services.

  • Are Backsplash Stickers Good?

    Are Backsplash Stickers Good?

    Peel-and-stick backsplashes are a great way to create a new look in a home. They mimic the look of traditional tiles and are easy to install. Plus, they’re washable and durable. However, they can be very expensive if you’re not careful. To find out the costs of your project, you can use a free home renovation estimator.

    Peel-and-stick backsplashes mimic traditional tile materials

    Peel-and-stick backsplashes mimic the look of many traditional tile materials, including marble, glass, and ceramic. These tile-like products are lightweight and are often available in multiple colors and patterns. Unlike their traditional tile counterparts, peel-and-stick tiles require little maintenance. To clean them, simply wipe them down with a damp rag.

    Peel-and-stick backsplashes mimic a variety of materials, including porcelain, ceramic, and stone. Some types are made of PVC, which is easy to clean, and stone veneer is made from crushed stone. Although these faux tile products do not provide the same look and feel as real stone tiles, they are less expensive. Other types of backsplashes are made of vinyl or PVC, which are easy to install and clean. They do not have the authentic look of natural stone tiles, but they are very durable and can be cut into many different shapes.

    For those who want to avoid the hassle of installing traditional tile materials, peel-and-stick backsplashes are a great alternative. The tile is easy to install and comes in a wide variety of colors and patterns. You can also choose the type of grout you want to use. If you’re using grout, use a color that complements your backsplash.

    Easy to install

    Using kitchen backsplash stickers is one of the easiest ways to change the look of your kitchen or bathroom without having to deal with permanent tiles. They are ideal for homeowners who want to change the look of their home frequently, or for those who are renting or living in apartments. Installing these stickers is easy – you simply peel off the backing and stick the backsplash panel to the wall.

    Peel and stick backsplash products are easy to cut with a utility knife or pair of scissors. However, for best results, you should use a template made of paper, cut to fit the spot you want, and then transfer it to the panel for cutting. For thicker materials, you may have to use aviation snips to help you cut them to fit your design.

    Durability

    Before applying backsplash stickers to your wall, make sure you do a bit of research on the type of tile you’d like to use. You’ll find that there are many options available, and you can choose from a variety of different styles and colors. Some options include glass tiles, copper tiles, and faux tin tiles. In addition to choosing the best type of tile for your project, you’ll also need to prepare the wall properly. It should be smooth and free of cracks and holes, and completely dry before applying the tiles.

    Another advantage of backsplash stickers is their ease of installation. If you can’t install permanent tiles, peel-and-stick panels can be the perfect solution. They are great for those who change their look regularly, such as people who live in apartments. The process is simple: peel-and-stick wall tiles can be stuck to the wall by peeling the backing. They stick securely to the wall and are durable enough to hold the walls in place.

    Washable

    Washable backsplash stickers are the easiest way to customize the look of your kitchen backsplash without the hassle of installing tiles. These self-adhesive stickers are designed with an easy-to-use, cut-to-fit grid to make placement easy and precise. Once applied, they are easy to remove. They can be applied to any flat surface.

    These backsplashes are designed to give an old tile backsplash a new look or a plain white wall a facelift. They are made from non-porous vinyl, which means that they can be easily removed and cleaned. Moreover, you can dress up an old, boring drywall backsplash with upholstery fabric or acrylic sheeting.

    Budget-friendly

    For people who don’t have time to install a permanent tile backsplash, peel-and-stick backsplashes are the perfect solution. They don’t fade or discolor over time, and can last for a long time if cared for properly. These stickers also have more depth than real tiles, which can help increase the value of your home. Buyers are increasingly particular about the look and feel of a property.

  • How To Save Money on Home Improvements

    How To Save Money on Home Improvements

    If you’re planning to do some home renovations to make your family home better, more usable, more appealing or more comfortable, you’re probably wondering how to do it in a way that won’t cost the earth. This article will give you some advice on how to save money on your home improvements.

    Planning For Renovations

    To save money on home improvements you need to plan and then plan some more. For instance, if you know you’re going to use the same tile in your bathrooms you may want to bulk order even if there will be several months between one bathroom being completed and another.

    That means you also need to plan for where all these materials will be kept during the renovation work.

    You should start planning your home improvements at least six months before you begin. That way you’ll have time to do all your research and figure out exactly what you want to do and the order for it to be done.

    Choosing Quotes

    Planning ahead can also give you time to shop around for quotes. Don’t immediately dismiss an expensive company – they may have factored in costs which a cheaper quote hasn’t. Ask for a thorough break-down of all quotes you receive so you can compare them more accurately.

    A lot of cost comes from getting professionals onto your site to do the work, so you want to make sure that there’s as little downtime for them as possible. If they need to wait for plaster to dry before continuing on that room, then it’s better to have them move onto another area of the home rather than simply hang around or go home for the day.

    You may find that discussing what other work they can do at the same time results in a better value quote than the one you initially had.

    Should You Go The DIY Route?

    Consider carefully whether you would like to do some of the work yourself – you may feel confident in doing a lot of it, in which case you need to allocate enough time for the jobs, and this might mean taking time off work. You may also be able to have a professional start the job, and you finish it. Work closely with the professional you have chosen so that your timetables match up closely.

    There are many situations where DIY is a great way to go and websites like Homedepot.com make it easy to do a lot of renovation jobs yourself. There are many discounts and coupons to bring down the cost of materials to help overall.

    If you’re doing a lot of things yourself, it’s worthwhile writing out a proper timetabled plan. It’s always tempting to just jump in with a DIY project, but if you are attempting something on a large scale, then you need to see how it all fits together and ensure that your materials and tools arrive on site when you need them – to avoid unnecessary downtime or trips to the store.

    DIY websites can be very helpful with planning and the materials, and they can also help to save you time as well as money. Just make sure that you are confident in what you are doing and if you are unsure get help! You can end up spending a lot more money if you need someone to fix a problem you have created.

  • Installing a Glass Door Unit: Ultimate Guideline

    Installing a Glass Door Unit: Ultimate Guideline

    The glass doors components include two glass panes sandwiched between a metal or plastic frame. The other panel has rollers and a locking handle, whereas the first is meant to remain in place. To install a glass door unit, first, the frame must be assembled and then installed in the door opening, followed by the placement of the glass panels in the tracks. The assistance makes the process much simpler for the typical do-it-yourself homeowner.

    Frame Assembly

    • Place the frame on a level area and arrange the top, sides, and bottom. There is a deep channel in the top for the sliding door, a raised bead in the base for the rollers, and machined holes at both ends of the sides for securing the top and bottom.
    • Assemble the frame’s rectangular sides by fitting their ends into the slots on the top and bottom of the structure. Both the top and bottom have machined ports to line up with the corresponding holes in the side pieces. Drive the screws provided into the holes and secure the frame pieces at the corners.
    • Prepare an all-weather sealant and load it into a calking gun. When installing the doors, make sure you run a consistent bead of adhesive down the floor of the aperture. To install, position the frame over the sealant and drop it into the recess. Put pressure on the frame’s sides to make the fins on the outside edges touch the face of the framing on the wall on all four sides and across the top of the aperture.
    • With a 4-foot level, make sure the frame is vertical on all sides. The frame is affixed to the wall with 1 1/4-inch deck screws at 12-inch intervals.
    • Moisture flashing paper has to be cut to size and installed along the top and sides of the frame. The structure’s height may be calculated by adding six inches to the side measurements. Using a utility knife, cut two identical pieces of flashing.
    • Put together a staple gun using 1/2-inch staples. Each piece of flashing should be applied flat on the wall face on each side of the frame, with the inner edge of the flashing flush against the edge of the frame. Pairs of staples spaced every 12 inches should be used to secure the flashing to the walls.
    • Find the span of the frame’s top and add 12 inches to that number. Make a straight cut along this measurement and lay the flashing over the top of the frame, flush with the wall. Align the panel horizontally and vertically, then secure it with pairs of staples every 12 inches.

    Hardware and Installation

    The door’s swinging panel will be on one side of the entrance, while the fixed panel will be on the other. Put the stationary panel into the opening in the frame. The board is installed by having someone hold one edge while you slide the top into the exterior channel at the top of the structure and the bottom into the outer channel at the frame’s bottom.

    With your hand, push the panel’s outside edge against the opening’s frame, and then snug the panel’s inner edge to the frame’s side. Attach the bottom and top stationary clips to the panel’s structure using the screws provided. The machined holes in the door’s edge and the included handle assembly should be checked for quality. Handles often have stems that fit in the holes on the outside half and machine screw holes on the interior half.

    Attach the handle’s two halves using the machine screws, positioning them on the frame’s edge where the door slides. Then, place the swinging door vertically along one side. Put a roller mechanism from the kit into either end of the door’s grooved bottom. The roller mechanisms often have a pegged lot that fits into a notch on the channel’s inner face. A firm push on each roller will fully seat the tools into the door’s bottom.

    The panel’s handle should be oriented toward the opening as it is positioned at the frame. Pull up the panel’s edges and drop the top into the slot on the top rail. Drop the board until its rollers rest on the raised bead at the frame’s base. Slide open the door, then look at the other side of the frame to find the given rubber bumper. Finally, use the machine screw to attach the rubber bumper to the frame’s face.

  • Bathroom Cleaning Tips And Tricks 

    Bathroom Cleaning Tips And Tricks 

    It’s no secret that keeping a clean home can be a challenge, especially when you have a busy lifestyle.What is the Best Way to Clean a Bathroom? Assuming you are asking the best way to clean a bathroom with general cleaning supplies, there are some easy ways to make sure your bathroom and kitchen stay sparkling – without spending hours cleaning every week. Here are our top tips:

    • Use a power scrubber. A power scrubber can help you quickly remove soap scum, mildew, and grime from surfaces in your bathroom. This will save you a lot of time and elbow grease.
    • Keep a squeegee in the shower. A quick once-over with a squeegee after each shower can help prevent soap scum and mildew build-up.
    • Wipe down surfaces regularly. Wiping down surfaces such as countertops, sinks, and toilets on a regular basis will help prevent dirt and grime from building up over time. 
    • Invest in good quality cleaning products. Using high-quality cleaning products will make your life much easier when it comes to cleaning the bathroom – they’ll be more effective at removing dirt and grime, so you won’t have to work as hard (or use as many products).

    5 . Get everyone in the family involved in keeping the bathroom clean . Assigning specific tasks to each family member can help take some of the burden off of you when it comes to cleaning the bathroom . For example , one person could be responsible for wiping down surfaces , another could handle sweeping/mopping , etc .

    • Make your own cleaner. Take a cup of vinegar and add a teaspoon of salt in it. Keep adding flour until the mixture forms a paste. You can use this cleaner to clean brass hot water taps, stainless steel accessories, faucets etc.

    Bathrooms are one of the busiest and most visited spots of any house. Deep cleaning a bathroom takes a lot of time and effort. These are some steps to clean your bathroom fast and effortlessly :

    Clean out clutter:

    To begin, clear any clutter that may be on the counters, in the sink or on the floor. Move everything into one central location so you can easily put it back later.

    Clean Bathroom Accessories:

    Next, empty the trash can and wipe down the outside and inside of it. If there is any grime or residue build-up on faucets, light fixtures or drawer pulls, use a mild all-purpose cleaner to remove it. Be sure to rinse well afterwards.

    Scrub Toilets and Tubs:

    Next, the hard part – focus on cleaning the tub/shower and toilet. Start by spraying down the shower/tub with an all-purpose cleaner and letting it sit for a few minutes while you move on to cleaning the toilet. Use a toilet brush to scrub away any stains or residue in the bowl.

    Rinse everything:

    Once both fixtures have been cleaned, rinse them well with water. Any leftover soap or cleaner will leave a stain. So, make sure to rinse the accessories as well. 

    Wipe the wall and tiles:

    Wipe down tile walls with an all-purpose cleaner as needed (you may need to let this soak for a minute or two first if there is heavy build-up). 

    Sweep and mop:

    Finish up by sweeping and mopping floors – pay extra attention to corners and areas where hair tends to collect.